


"Beautiful creations for the cold season"
If it storms and snows outside, it is all the more cozy inside. Especially when winter is not shown by its most beautiful side, this time of year is created for extensive handicraft afternoons. Handicrafts with children is one of the most beautiful jobs that gathered at a table. Today we give you a few wonderful craft ideas for the winter that you can already implement with the little ones.
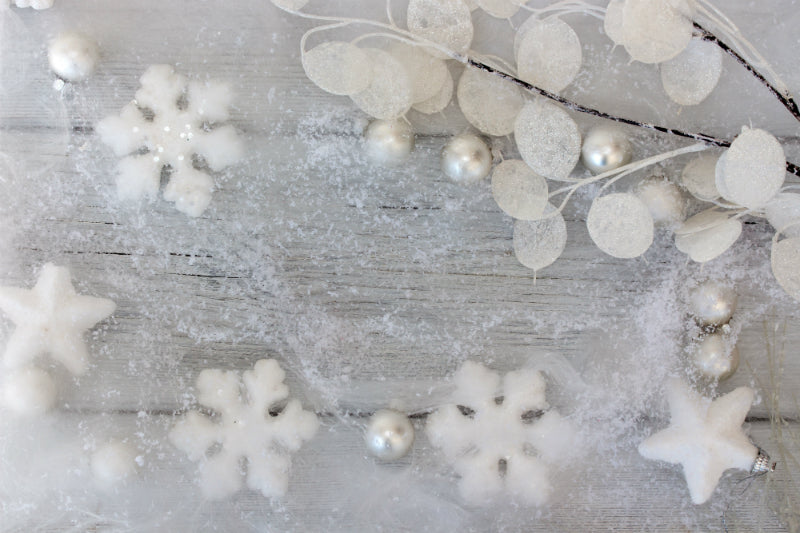
Handicrafts for winter
While bright colors dominate in spring and autumn shows itself in all conceivable red and brown colors, the colors prevail white and light blue in winter. Winter landscapes, snowflakes and snowmen are very popular when it comes to motifs and ideas about tinkering in winter. It's best to be inspired by our handicraft tips and always bring your own ideas and ideas. This is the only way to create unique, small works of art.

Craft ideas for winter
Craft tips with pearls, Nuscheli and other craft materials
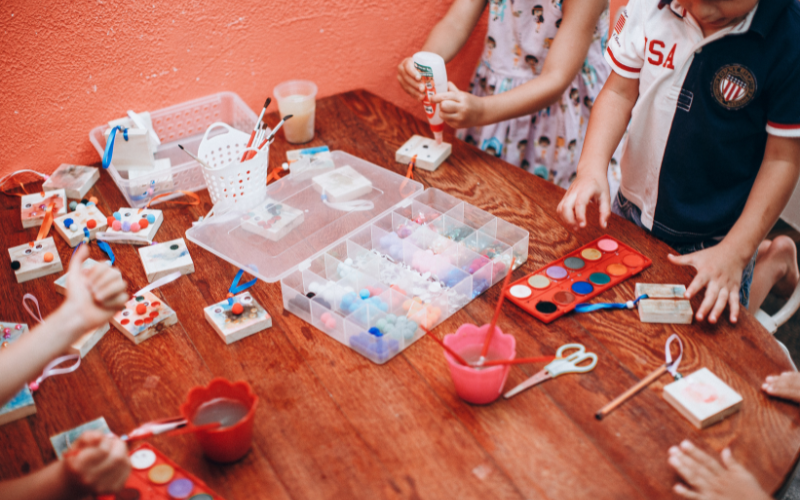
Before we can start, it is important to provide the most important handicraft utensils. Handicraft beads and more craft accessories For your winter handicraft afternoon, you will of course also receive directly from us in the dwarf! When everything is there, it is best to put an old blanket on the table, pull over an apron to the small handicrafts and ensure sufficient light.
For the following handicraft tips you need, among other things:
- Handicrafts
- Craft wire
- Crafting home
- Foam balls
- Wood pearls in various sizes and shapes
- Thread cords
- Crochet pearls
- Nuscheli


Winter collage - many design options
Collages are ideally suited to combine the most different materials as possible on a picture. A project to deal with young and old together. For our beautiful winter collage you need the following materials:
- 1 large piece of cardboard (min. A5)
- Light blue ink paint and brush
- glue
- Nuscheli in yellow and white
- Felt in green and brown
- Thread cords
- Wood pearls in white and in different shapes (lentils, classic, large)
- Scissors


The background
Start with the background when tinkering with the collage. The perfect task for the youngest at the table. Because now it is time to paint the cardboard completely with light blue. A wintry background arises.
1. The snow clouds and the sun
Now take the white Nuscheli and cut two to three clouds out of it according to the feeling. Glue it on the cardboard. For the small snow show, we simply make small cords from the white pearls. Please not too long. Up to five pearls are sufficient. Like to design the cords in different lengths, which ultimately ensures more liveliness on the collage. This time the cords are simply attached to the clouds with hot glue.


Of course, the sun also seems in winter. Hence take the yellow Nuscheli on hand and cut out a sun. The background is already finished.
2. Design winter landscape
Now a winter landscape is being designed. To do this, place the remains of the white nicheli so that small mountains are created. Feel free to work with several layers and then glue them up. You tinker the trees out of the green felt. Draw tip triangles on top and then cut them out. The tree trunks are made in the same way.

Simply take the brown felt and record a trunk to match the tree peaks. At the end, glue the trunk and tree tips.
3. Complete details
These handicraft tips are ideal for the little ones among the creatives. If you have even older children, you can make these more demanding details. Children on a sled, snowmen and animals complement the winter collage excellently.
Tip: If you have no felt at hand, Nschelis in brown and green are also available.
You are also welcome to use other remnants of fabric in the corresponding colors. The more imaginative it becomes, the better it looks in the end.
Design snow -grading from different handicraft materials
Handicrafts in winter are characterized by all kinds of snow motifs. Above all of the snow esters. We give you handicraft tips for snow -eating wooden beads and craft wire. Enter the following materials:
- some craft wire
- Wood pearls small in white or also light blue
- Linse beads in a similar color

Snow altars on glittering surfaces
1. Premature the star
To do this, cut three wires from the handicraft wire to the same length. Feel free to cut the lengths a little more generously, because the wires have to be twisted together. Place the three individual wires on top of each other so that a star shape is created. Advanced people can work with more than three wires. Turn the wires together until the shape is preserved.
2. Thread pearls as you wish
Now these blanks need fine grinding. Now it is important to thread the pearls. It is best to start with the smaller wooden beads and later lentil beads and wooden beads can be alternated alternately. Simply knot the respective end so that the wooden beads cannot slip again.

Tip: Give more colors to the stars. One or the other splash of color tolerates a trip over and gray winter day.
A family of snowmen - great handicraft tips for the very smallest
When it comes to handicrafts in winter, snowmen should never be missing. There are a lot of handicraft tips for snowmen. We are making an entire snowman family with you!
Your handicraft material:
- Round wooden sticks
- Cardboard for the display
- White Nuscheli
- Foam balls in three sizes each
- Wood pearls in black and red
- Craftsman or hot glue

Christmas snowman
1. The basic structure
Cut the cardboard into a round circle that is not larger in diameter than the largest foam ball. Sting a small hole in the middle and put some glue on the edge. Now put the rod through.
Let the basic structure dry. In the meantime, they take care of the body from the snowman.
2. Wrap the ball for ball with the fabric
Take the white cloth to hand and cut it into wider stripes. With this, they now wrap the balls individually until the fabric completely envelops it. Fix the whole thing with a little hot glue. Go on until all three foam balls are wrapped in the Nuscheli. In the end, several layers usually look even more beautiful than just one. So be a little more generous.
3. Set a few nice details
First drill a hole through every ball so that you can then push it over the wooden stick. Apply some glue on the bottom cardboard. So the lower ball holds really well. For the upcoming parts, please also put a little glue on the lower ball. Simply put beautiful details with the wooden beads. Black pearls for the buttons and eyes and the red pearl for the nose.


Craft ideas in winter can be very versatile and offer you a lot of variety for creative hours. We hope you enjoy tinkering with your children!