


In retrospect, the year has passed and hardly start the last days of the old year, of course the last highlight is waiting for the family: New Year's Eve! Every family spends the last evening of the year in its own way. But regardless of whether you only celebrate in the narrow family or will be a host for all relatives and friends, without the right New Year's decoration, most of them are not possible. We show how they can tinker with their children themselves.
Every celebration needs suitable decoration
Especially between the holidays, when shopping is particularly stressful, it is actually ideal to use free days with the children as a time together. So waste no additional time between the supermarket and the drugstore, but make at least part of the decoration for New Year's Eve. This is fun for everyone, is in the spirit of these holidays and also gives your "New Year's Eve Gala" a personal touch. There are numerous craft ideas for the turn of the year.

Every celebration needs suitable decoration
Feel free to be inspired and combine colorful air and balloons with your own creations. Tinking up New Year's Eve is not particularly difficult. We give you a few craft tips and craft ideas for a great New Year's Eve.
New Year's Eve decorating with children
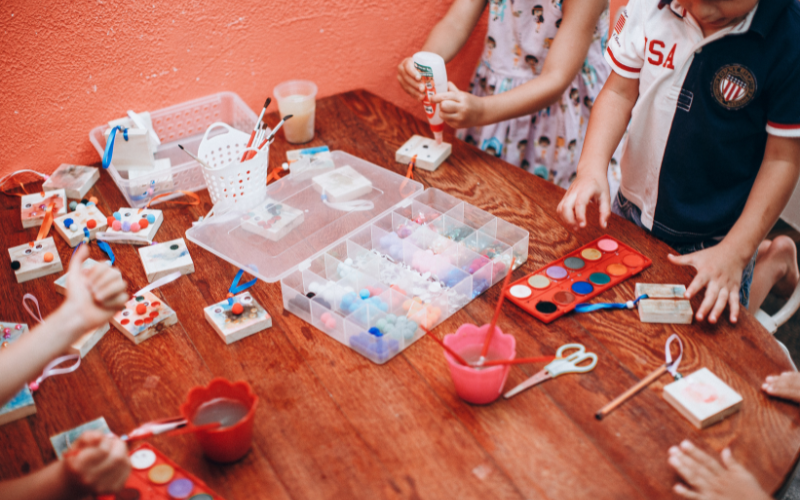
As soon as children live in the household, many discover the joy of their own creativity. This can also include tinkering the New Year's decorations this year. The right one Buy craft material onlineis quick and easy in advance. You will find a large selection in our shop.
Tinkering with children for New Year's Eve Disco. The strenght is to be found in serenity.
First, consider together which decoration you like and then select the corresponding handicraft material for it.
Craft tips for the New Year's Eve decoration
First of all, this night is all about luck and is full of good wishes for the new year. This topic is a good basis to make suitable New Year's Eve decoration.

Craft tips for the New Year's Eve decoration
Clover leaves made of wire and pearls for table decoration
Above all, the new year should bring luck. What could be more obvious than a four -leaf clover. For the New Year's decorations, the children tinker several of these leaves.
Here you need the following handicraft material:
- Craft wire
- Green wooden beads (Choose as small pearls as possible)
- green thread cords
- thin wooden sticks
1. Form the individual leaves
Depending on the desired size, take a piece of handicraft wire and cut it into four pieces of the same length. Now bend a leaf shape from the cloverleaf. The lower ends initially remain open.
 in den Farben Lemon, Apfelgrün und Tannengrün")
2. Thread the pearls
Now thread the wooden beads. You are welcome to fall back on different green tones. Light green, dark green or green and white striped. That is all at your discretion.
 in den Farben Apfelgrün und Lemon")

3. Close the sheet and put together into a complete cloverleaf
Now it is important to close the individual leaves at the lower end. Then there are four identical clover leaves in front of them. With the help of another piece of handicraft wire, these are now connected.
 in der Farbe Tannengrün")
4. Attach to the wood
So that the cloverleaf comes into its own, you now attach it to a small wooden stick. You are happy to wrap this with green thread cord and hold the first New Year's decoration in your hands.
Decorate an annual glass
A nice custom that receives its way into more and more families is the annual glass. It is a simple screw glass, which is initially designed together with the children and the family. It first serves the New Year's Eve decoration and later it accompanies them through the year. From the first week in the new year, put a small note in it. It likes what was particularly beautiful or less beautiful during the week. At the end of the year you have 52 pieces of paper, which you then read together with the family on New Year's Eve and thus experience a wonderful review of the year. This is guaranteed to be an unforgettable New Year's Eve with children.
We need the following handicraft materials for this:- 1 large screw glass
- Nuscheli in any colors
- Fread cords in different colors
- Wood pearls in different shapes and colors (also gladly lens pearls)
- Motivation beads
1. Tinker the individual elements
The glass is designed by all family members. Everyone can take on a task that he particularly enjoys. They let their imagination run free. Cut the snuggling into narrow strips. These are wrapped around the glass and fixed with craft gimmick. Use the fabric railways as a surface. They braid various threads from the thread cords. The more colorful the more beautiful. A task for the larger children. The little ones can of course also participate.


You can thread the colorful pearl cords. Feel free to use a colorful mix of all conceivable sizes and shapes of the wooden beads. Lentil pearls or groove beads are also suitable - the more colorful, the more beautiful. These chains can vary in length. You also set beautiful accents with motif beads.
2. Decorate the glass
Now it is important to put the braids and the colorful chains around the glass. You can make as many as you want. Depending on the size of the glass.
Finally, the number beads are needed. These will write the coming year. They like to thread the number beads alternately with a pretty wooden pearl. This small chain is now glued to the lid.
Make desired cloths
There are usually a few big and small wishes for the new year. Write them on a Nuscheli. For this decoration you only need different Nuscheli and a fabric paint. In addition, you can still use finger colors to design the towels individually from the offspring.
1. Place the Nuscheli and write your wish on it:
- "HAPPINESS"
- "HEALTH"
- "LOVE"

2. Let the cloth design with some color from the little ones. This gives the whole a unique note.
In order to be able to use the towels as a decoration for New Year's Eve, clamp a leash across the room or along a wall. There they hang up the desired cloths. Feel free to loosen up this homemade garland with other elements. Air clasps and balloons can also be attached alternately.
The lucky pig
In addition to the cloverleaf, the pig is the lucky symbol on New Year's Eve par excellence. Little lucky pigs are among the most beautiful handicraft ideas.
Your handicraft material:- Disused socks or remnants of fabric
- Rosa Nuscheli
- Cardboard pier
- Black wooden beads
- pink thread cords
1. The body
Take the socks or also fabric remains and put them together into a body. Wrap the whole thing with the pink fabric towel until you have completely covered everything. Feel free to wrap several layers.

2. Nose, eyes and ears.
For the typical pig truck, cut a round circle out of the cardboard paper, which is suitable for the body from the size. Wrap this with the pink fabric towel. Now apply two vertical, black lines with a fabric pen. You can attach your nose with hot glue. The black wooden beads form the eyes and the ring tail is attached from the pink cord.


To do this, braid several thin cords into a stronger one. Only a few ears are missing. These are also cut from the cardboard paper and wrapped with the fabric. Let a small adhesive fold up so that the ears can be attached. May the little pig bring you luck to you and your family.
On the places, done, let go - we wish you a good start to the new year
We hope to have presented you with some nice handicraft ideas and handicraft tips for the decoration and now wish you a lot of joy and creativity when trying it out and tinkering!