"Greet Lenz with a lot of creativity"
Finally it means winter ade! The days get longer and, above all, warmer. Reason enough to greet the wonderful season creatively. With the right handicraft ideas for spring you give your home a fresh and floral note. Spring handicrafts with children have many options. So let yourself be inspired a little today and look forward to great handicraft tips and handicrafts on the subject of spring.
It should be floral and colorful
The Lenz stands for awakening and blooming. So it is welcome to approach colorful and happy. The children are happy about all the bright colors outside and get the desire to design colorful things themselves. You therefore bring the beauty of nature to your home with spring tinkering.

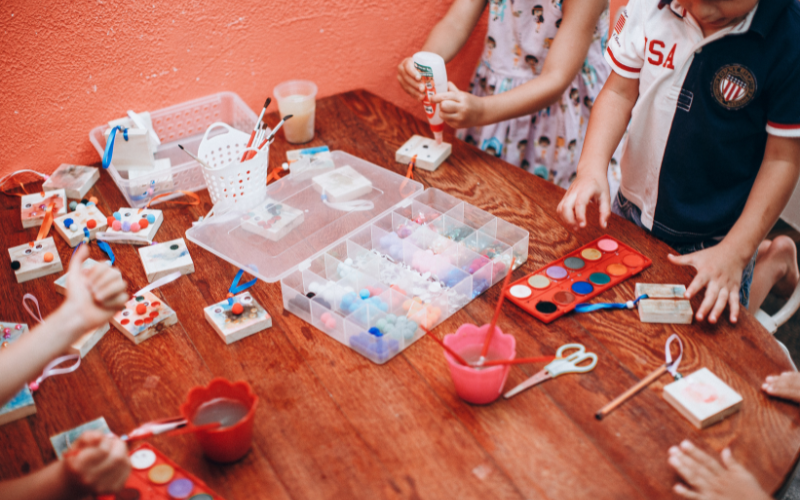
Take a little time and get yourself first beautiful handicraft material. If everything is at hand, spring tinkering with the children becomes a nice time. Among other things, you need this handicraft material:
- Scissors
- Hot glue
- Thread cords
- Colorful pearls in different forms
- Nuscheli towels in different colors
- Excessed glasses
- Craft wire
- Cardboard paper
- Toilet roles
- Twigs
Crafts for spring - a meadow in the lantern
Now it can basically start. Let's start with a magical lantern in spring -like robe. The crafting in spring is all about fresh and bright, happy colors. What could be more obvious than designing a meadow in spring and not only on paper, but once in the form of a lantern?


- First take one of the empty glasses on hand. In the end it always looks pretty when glasses of different sizes are used. Wrap the lower area with green fabric. It symbolizes the green of the meadow. Just place the fabric around the glass and fix it with a little hot glue.
- You can lay the second track with a yellow or light fabric. Blue fabric is used below the edge. In the end you have three different fabric tracks on the glass.
- Now they are designing the meadow. To do this, put small wooden beads on hand. You are also welcome to use lentil beads. This optically ensures a little more variety. Use a fabric pen to draw small flower stem. At the top of which one or more pearls are now glued. How many flowers are possible, of course, depends on the size of the glass. Be creative and make a beautiful spring meadow in this way.
A colorful wreath of beautiful pearls
Flowers are a varied topic when it comes to spring tinkering. These can arise in very different forms. This time we design a wreath of pearls. A real eye -catcher that you can make together with your children. The following handicraft instructions show you how to do it:


The best handicraft ideas come from with little material! You only need some handicraft wire and pearls in all conceivable colors and shapes.
- Cut three generous ends from the handicraft wire. That can be good and gladly in length. Now you can thread the pearls to your heart's content. Various sizes and shapes are welcome to be used.
- The individual strands can be threaded into the same color shades for something more demanding with children who are a bit older. Of course, that also looks beautiful.
- Now knot the ends. Now some skill is required, because a wreath is important from the three individual strands. To do this, create the three strands next to each other and apply the braided technology. The elements do not need to be tied too tight, but are simply loosened. The entire work is put into a circle at the end and a colorful wreath is ready - and thus one of the beautiful craft ideas for spring.
Bees buzz around - handicrafts for small bees
They buzz around and ensure that the flowers are pollinated. These little helpers of nature are also among the great craft ideas for spring. The handicrafts with children of infancy in particular are a lot of fun with these handicraft tips!


We need this:
- Toilet roles
- Black and yellow Nuscheli
- Black lens pearls
- Chenilled wire in black
- white paper
- Start making the bees' body. To do this, first cut the yellow and black fabric into small strips. Now they alternately wrap them around the empty roles.
- Glue two black pearls as eyes. The sensors are created by simply attaching two small pieces of the chenille wire.
- Now make the wings. Draw it on the paper and cut out the wings. Known a small adhesive fold so that it can keep better. Use hot glue because it is a little better on the fabric.
Handicraft instructions for window decorations - more craft ideas for spring
It is wonderful as soon as the first warm sun rays shine through the window is essential window decorations. In addition to the classic handicraft material, you only need a few beautiful elements for our window garland directly from nature. So be sure to plan a short walk to collect the materials.


Now get the following materials ready:
- Thread cords
- Pearl
- Craft wire
- Natural materials as desired
- First of all, in a few pretty pearl chains you thread free as you please. There are no limits to your imagination. Feel free to vary in length. This later ensures more liveliness when the garland is finished. At this point, the little ones will certainly help you with zeal.
- In order to set beautiful accents, natural materials are integrated in addition to the colorful chains. For example, wrap small branches with threads. Not too tight, so that the natural colors of the branches are still easy to see.
- Take a handicraft wire and thread leaves. In addition, it is possible to attach the first spring bloomers to the wire and also wrap them with a little cord.
- Now put the individual elements together into a garland. The pretty pearl chains and natural materials are alternately attached to a firm rope. A garland is created that becomes a magical window decoration.
Tinker!
When it comes to craft ideas for spring, there are hardly any limits to you and your little ones. Green shades and pastel tones are primarily used. Spring itself is one of the most beautiful seasons ever and spring tinkering with the children can even take place outdoors on beautiful days.
We wish you a lot of fun with our craft ideas and good luck!
Tinker

