" Technical skills are learned in childhood "
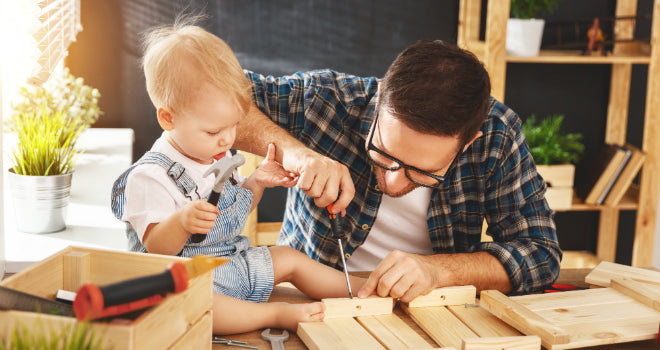
In contrast to the past, crafting with children is no longer an everyday activity. However, children can gain a lot of valuable experience, practise motor skills and acquire important basic scientific knowledge. As a parent, you should encourage your child to gain their first experience with handicraft activities. The following article explains how this works and how you can provide the necessary space.
Why is crafting with children so important?
Even babies know that they can learn new and interesting things by using their senses. They feel different things to test their texture and usually also put them in their mouth to taste them. Later on, children learn how to work with craft materials. They explore extensively what they are made of and what can be done with them: "I can file, plane and saw wood, but hard concrete is difficult to work with!". In this sense, handicraft activities are an excellent way to make the world a little more understandable for even the youngest children.

Have you ever let your child do handicrafts?
Skills are also encouraged, if a project is to be successfully implemented, it first needs a decent plan and good organization. Crafts allow even the youngest children to try things out for themselves and experience things that many people today hardly ever come into contact with. Unfortunately, there is often a lack of reference to craft materials and how they are made. Many people don't know how a table is made or which wood is best suited to building a marble run. That is why it is important that you as a parent actively encourage and provide the necessary craft materials materials.


From what age?
You can let your toddler gain their first experience from the age of around 3. Show and explain how different materials are put together and how they differ from each other. Of course, don't just support them in the early stages, but also later on when the projects become increasingly complex. Before you start using tools, you should make sure that your child already has the motor skills to handle them safely. They will only be ready for their first real projects when they understand that these are not just any old toys, but important work materials.

Pay attention to age! Little ones should not use heavy tools
Arts and crafts with children: Are there differences?
Many parents will certainly remember craft lessons from school. Today, handicrafts are part of work lessons, which are increasingly being replaced by more modern subjects. However, it is by no means an unimportant, old-fashioned school subject, as it teaches children how to use nails, hammers, wood, metals and many other materials and tools correctly. The focus here is on planning and implementing various projects. Working correctly with the materials is also an important component. This is where the differences between work activities and handicrafts lie: When crafting with children, significantly more different materials are used. Felt Christmas stars, animals made from toilet paper rolls, paper folding techniques or making window pictures don't really have much to do with handicrafts.
What craft materials and tools should I use when working with children?
Whether in the family, at nursery or at school, many children learn their first crafting techniques relatively early on. Even with small children, you can explore different materials so that they get to know the consistency and grip of stones, wood, kneadable masses, sand, water and similar raw materials. It is important to consider which tools your children should and can work with. There are tool sets available in shops that are specially made for small children's hands. Even if many parents notice that children prefer to work with big, real tools, you should still try to introduce your offspring to the advantages of children's tools. They have smaller dimensions and are generally lighter than tools for adults. This means that small hands can hold them securely and firmly.

Children should practise with children's tools first
In order to encourage your child's enjoyment of working and to promote the creative process, you should definitely place value on high-quality children's tools. Even if these are generally a little more expensive, they are still much more durable, safer and, above all, more suitable for children. With these special tools, your child will have something of their own that they can be proud of and at the same time learn how to handle craft materials carefully and consciously.
Crafting with children: Two wonderful and easy-to-implement ideas
Crafting usually requires a lot of manual skill and creativity from parents too. But don't worry: you too can only grow with your challenges. Finally, we would like to introduce you to two great ideas that are not only easy to implement, but also really make a difference when finished:
Making a birdhouse
Materials required:- 18 mm thick wooden board (spruce, fir, pine)
- 10 mm thick wooden strip (80 cm long)
- Plexiglas (3 mm thick)
- 40 wood screws
- 2 eyebolts with wood thread
- Rope for hanging (approx. 1 meter long)

Two children build a birdhouse
Get started:
- First, the individual parts must be sawn to the appropriate dimensions. Depending on their age, your children will probably need your help with this.
- In the second step, the base plate can be screwed to the side parts and the partition wall.
- The two Plexiglas panes, which are to represent the food dispenser, are then attached to both sides of the upright wooden walls. Make sure to keep a distance of at least about 2 centimeters from the base plate to ensure good distribution of the feed grains.
- The roof panels can now be fitted, whereby only one of them is attached, while the other can be fitted with a hinge so that it can be opened to make it easier to refill the feed.
- Finally, the eyebolts are screwed into both side walls. You can now attach the rope for hanging.
Making a wooden picture frame
You will need- Wooden strips by the meter
- Wooden brackets (no wider than the wooden strip)
- Acrylic panel cut to size
- Brackets with eyelets for hanging
- Thin fiberboard
- steel pins
- wood glue
- Mitre box, wood saw, tension belt, small hammer, sandpaper (120 grit)

Making a picture frame together
And this is how it's done:- Saw the wooden strip to size at a 45-degree angle.
- Place the strips on a scratch-resistant surface - with the front side facing downwards - and apply glue to the cut edges.
- Now secure the slats with the tensioning strap until the wood glue is completely dry. 4. then place the four brackets on the back and screw them in place.
- Now remove the tensioning strap and check your work for possible faults, bumps or anything else. If necessary, you can sand the frame again with sandpaper. The picture frame should then be varnished or painted so that it lasts as long as possible.
- Now insert the acrylic glass cut to size and you can place your picture in it. Finally, attach the fiberboard to the frame and secure it with the steel pins.
- Once you have finished, you can decorate and paint as you wish. Colorful beads, funny figures made of silicone, colorful tape or the like are ideal. Your toddler can let their creativity run wild here.


