" Beautiful craft ideas for the fall "
Now is the time when nature seems to dip its brushes into its paint pots and paints the leaves on the trees in the most beautiful colors. A sea of red, yellow, green and orange as far as the eye can see. The perfect conditions for an afternoon of crafting in the fall, because crafting with leaves is versatile and multifaceted. Children of all ages can get actively involved and create small works of art. Crafting in the fall gives you unforgettable moments and beautiful memories. Let's take a look at the craft ideas that inspire the imagination.
Let's start with a walk
If you want to craft with natural materials in the fall, you first need to tie your shoes and head out into the woods and parks. You'll find everything you need here. Go ahead and collect a little more foliage, because we have a lot planned! In addition to lots of leaves, chestnuts, acorns and even thin twigs or moss belong in the little treasure chest. Then you and your child are very well equipped with natural materials. Add a few pretty wooden beads in autumnal colors, as well as string and fabric. Grab some scissors, glue and paintbrushes, tie an apron and you're ready to go.

A long fall walk is wonderful for collecting materials
Craft ideas for the fall - from simple to challenging
When we want to do crafts with children, it is important to consider the age of the little ones. That's why, as usual, we provide you with various craft ideas so that you can decide for yourself what you want to do with your child. Let yourself be inspired and feel free to add your own creative ideas to the instructions provided.
We start with something very easy. The youngest children will get their money's worth here:
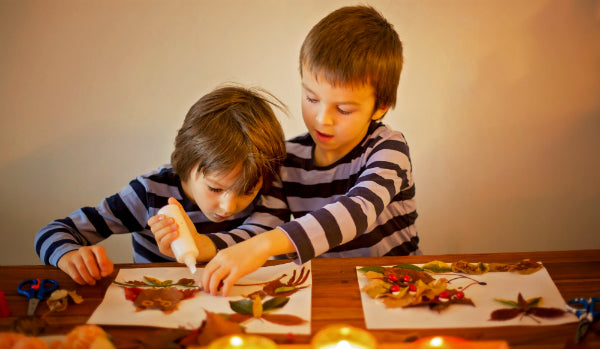
Animal pictures are created from a colorful variety of leaves
- Prepare a few large sheets of paper. Craft cardboard is ideal, as this paper is somewhat stiffer and is better suited to sticking on leaves. Think together about which animals you want to create.
- First draw the outline of the animal using a template. Light shapes are more suitable for younger children. For example, a hedgehog.
- Now take a sheet and stick it inside the outline. Then glue on the next leaf until the entire figure is just leaves.
- The animals can be embellished a little with a fiber-tip pen. The nose, eyes and mouth can be drawn in wonderfully.

Animal pictures made from leaves
Creating leaf garlands and necklaces
They are a real classic among autumn decorations and to ensure that you can enjoy an autumn garland for longer this time, proceed as follows:
Melt the wax, but do not boil it. Dip the leaves one by one and then hang them up to dry. This method seals each individual leaf and preserves it to a certain extent. You can also use this method for other projects.
- Take some string and a needle. String one leaf at a time. Continue until you have reached the desired length.
- You can add colorful accents by integrating small strings of beads between the individual leaves. Preferably use natural shades of color for this. Wooden beads work wonderfully.
Decorating pumpkins with leaves
At the end of October, pumpkins are a big hit when it comes to fall decorations. However, Halloween craft ideas don't just include carving them, but also designing them in a completely new way. You are welcome to choose different sized pumpkins. You will need for the next project:
- leaves
- White paint
- string
- lentil beads
- glue


- First paint the pumpkins with white paint. A thin layer is enough. You can create small highlights by simply laying string over the pumpkin. This creates thin, irregular lines that allow the original color of the pumpkin to shimmer through.
- Once the paint has dried, you and your child can get creative. It is entirely up to your imagination how you stick the foliage onto the pumpkin. It can be wild and jumbled, but it can also be arranged in a circle. The result is always impressive.
- For decoration, glue on small lentil beads that harmonize wonderfully with the glued-on leaves.
Pretty candle holders with autumnal decorations
The days are getting shorter and we use candles to create a cozy atmosphere. Crafting with leaves is incredibly versatile. The children can help you again with the following instructions. This time we need
Variant 1
- Glass containers with different diameters
- moss
- chestnuts
- small twigs
- foliage
- Flat candle holder

Chestnuts can be used in a variety of ways when crafting
- Place the flat candle holder and candle in the smaller glass container.
- Now place this in the larger glass container. Fill the space in between with moss, small chestnuts, thin twigs and a selection of leaves.
Variant 2
- a larger glass container
- tea lights
- glass lid
- lentil beads
- moss
- twigs
- Leaves

Foliage offers plenty of space for creative crafting fun
- Gradually fill the container with the specified materials. Layer them up slowly. For example: Starting with the lentil beads, then a thin layer of moss, which in turn is covered by small twigs and finally a blanket of colored leaves.
- Once you have filled the jar, place a glass lid on top and place a few tea lights there.
Making a bowl out of leaves
Our last suggestion is unusual and equally beautiful. For the last project for crafting with children, you will need the following materials:
- Balloon
- craft glue
- lots of different leaves

Use leaves and glue to make great bowls from natural materials
This time, a little preparatory work is required. Place the leaves between book pages to dry. This can sometimes take a few days. After drying, carefully remove the leaf stalks. Chestnut leaves are particularly suitable here, as they have a beautiful, large surface and are striking in appearance.
- Inflate the balloon to the desired size. Please never make it too tight, otherwise it could burst prematurely.
- Place the balloon in a bowl to make it easier to work with.
- Spread a first thin layer of craft glue up to half of the balloon. Think about the size of the bowl you want to hold in your hands at the end.
- Now gradually glue on a leaf. Patience is required here. Because before the next leaf can be glued on, the previous one has to dry at least a little. Continue until you have glued on a complete layer of leaves.
- Now allow the whole thing to dry thoroughly. When the leaf shell is firm and dry, simply let the air out of the balloon and you have a work of art in your hands. A real eye-catcher, not only in the fall.
We hope that we have provided you with some great ideas and inspiration for crafting with leaves and wish you lots of fun with your fall crafts.


